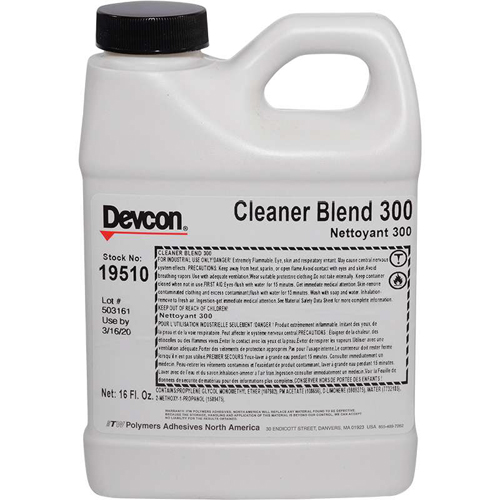
CLEANER BLEND 300
DEGREASING
The degreasing of surfaces that are immersed in oil is usually the most difficult to do. There is always the possibility of the absorbed oil in the metal surface that will cause an adhesion problem after the epoxy is cured. An oily pump shaft or bearing housing is an excellent example of a part that would be immersed in oil prior to using Devcon Metal Repair Epoxies.
1. Apply Cleaner Blend 300 to the oily surface. Repeated applications of these cleaners will help to “draw” the oil out of the surface.
2. Absorbed oil from metal surfaces that have been constantly immersed in oil, should be removed by heat. The heat forces the oil out of the pores. Heating the part with a heat gun or putting the part in an oven will produce this effect.
3. Allow the surface to cool and then degrease it again with Cleaner Blend 300.
SURFACE ROUGHENING
Always abrade a smooth surface to increase the adhesion of the epoxy to the substrate. Many field applications are redone because someone forgot to get a good surface profile.
1. If the surface was cleaned by abrasive blasting, grinding, shotblasting, or needle gun, the “roughen” effect should be sufficient to coat.
2. Otherwise, roughen the surface with a coarse sandpaper or a file.
WET SURFACES
1. General procedure concerning any area that is to be repaired using Devcon Industrial Epoxies: “It Must Be Dry!!!”
2. An exception is when you use Devcon’s Wet Surface Epoxy UW. (See the Underwater Surfaces section.)
3. First stop all leaks or seepage. This may be done by many means:
a. Shut off the flow or pressure.
b. Fit a wooden peg or a sheetmetal screw into the hole to stop flow.
c. Stuff wax, cork, plumber’s caulk, Mortite, or a cloth into the opening to stop the flow of liquid.
4. If the leak is caused by corrosion, the side wall might be weak. Open the orifice until good metal is exposed and the wall is thick enough to be plugged. Then plug the opening with the recommended materials. (See number 3.)
5. Remove surface condensation “sweating” and dampness by using a hot air gun or a similar device.
6. Continue with the General Surface Preparation Guidelines.
GENERAL SURFACE PREPARATION
1. All surfaces must be dry, clean, and rough.
2. Stop all liquids from leaking onto the surface while repairing the substrate.
3. Remove all paint, rust and grime from surface by abrasive blasting or other mechanical techniques.
4. Degrease area with Cleaner Blend 300.
5. Provide a “profile” on the metal surface by roughening the surface through abrasive blasting or mechanical means.
CLEAN SURFACES
1. If surface is oily or greasy, use Cleaner Blend 300 to cleanse the surface.
2. After the recommended method of cleaning, abrasive blasting is done to the surface to produce a good “Surface profile”. Oils and contaminants usually get imbedded into the surface and do not wash away with degreasing.
3. The blasting medium should be angular grit such as silicon carbide, Black Beauty, or aluminum oxide. A .003 to .005 mil profile should be attained. The medium Black Beauty (Size 1240 medium grade) will produce this grade.
4. If you cannot abrasive blast the substrate, you may use a coarse grinding wheel (60 grit or coarser) or a needle gun to achieve the desired mil profile.
5. High velocity water blasting with abrasive medium is also recommended. After the blasting, degrease again with Cleaner Blend 300. This helps wash away blasting medium that becomes lodged in the profile of the metal. Be sure to apply Devcon Epoxies immediately after blasting to prevent rust blooming.
6. Always try to make the repair as soon as possible after cleaning the substrate to avoid oxidation or flash rusting. If this is not practical, a general application of FL-10 Primer will keep metal surfaces from flash rusting.


